How to Deploy Node App to Heroku

In the last couple of years, Node.js has become one of the most preferred technology for building backend services, with the rise of microservices, Node.js has become even more desirable. That is because it is fast, stable, and almost every web developer today know JavaScript. The last phase of building the Node.js app is to find good and cheap hosting. In this article, we will see how to deploy Node app to Heroku.
What is Heroku
Heroku is a cloud application platform that allows developers to deploy, manage and scale modern apps. Heroku platform is elegant, flexible, and easy to use, which in the end, it is offering to the developers the simplest path to get their apps on the market. Heroku officially supports most of the programming language used today for building backend services like Node.js, Ruby, Java, PHP, Python, Go, Scala, Clojure and in addition to the officially supported languages, you can use any language that runs on Linux with Heroku via a third-party build-pack.
In this article we are using the Node.js app for the examples, but the process is very similar if you are using other programming languages or frameworks as well.
Node App Deployment on Heroku
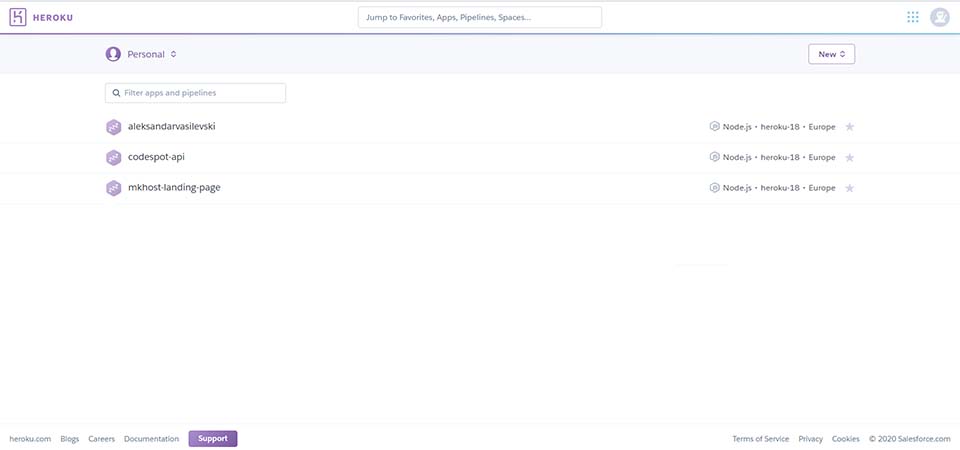
To deploy node app on Heroku, firstly you need a Heroku account, which you can create for free in a couple of minutes. When you sign in to the Heroku, on the first screen you will see all your deployed applications and a button named new, which is what we are looking for, and in the dropdown menu, we need to select create a new app, as in the picture below.

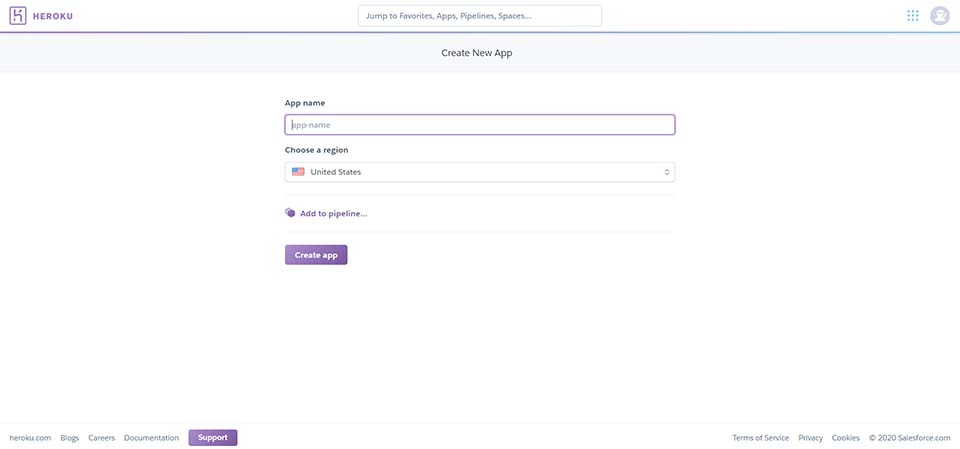
The next step in the app deployment is the create a new app screen, where you need to pick a name for the app and chose the region where the app will be hosted. as it is shown below.
Chosing proper region is important as will reduce the lag in the app

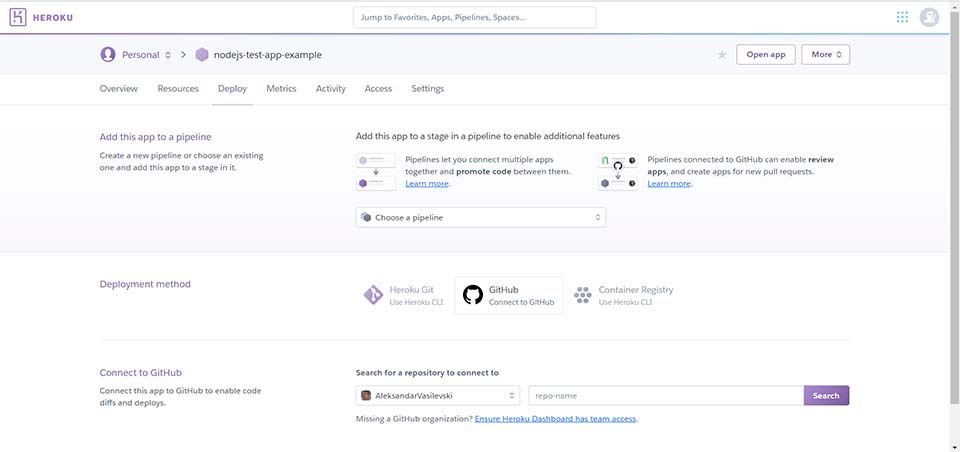
In this step, you have a much detailed screen, where you need to connect the repository with your node.js application with the Heroku. There are a couple of ways to do that, one is to use Heroku Git, but the preferred option is to have the Node.js application on GitHub and to connect the Heroku with the repository. To do that you need to select connect to GitHub, like in the example below.

When you select the connect to GitHub option you will need to search for the repository on GitHub after that new options will appear on the screen when you need to choose a branch to deploy, and here you can enable automatic deploys from GitHub, which will update automatically when the branch is updated. When everything is ready you just need to press the deploy branch button, and if everything is ok with the app, after a couple of seconds the message "Your app was successfully deployed" should appear, which means your application is live.
If there are problems during the deployment you can check the activity tab on the top which has log messages. In the settings tab, you can Config Vars, where you can set your environment variables for production.
Conclusion
As we can see from the steps above, deployment of the app on Heroku is not hard at all, it can be done in a couple of minutes. There are many more tools that the Heroku platform offers to the developers, there are priced packages too, which are also great if you have a bigger app. In the end, I hope you can understand how to deploy the Node app to Heroku if you find this article useful please share it.
Tweet